
Imagine asking for the weather, then realizing your smart speaker might remember your voice longer than you expected. In 2026, voice assistant privacy settings matter more than ever, because Alexa Plus, Google Assistant, Siri, and Bixby can collect voice data, store parts of it, and use it for personalization and targeted ads. Even worse, “always listening” wake words can sometimes catch nearby talk by mistake.
If you feel uneasy about being overheard or served creepy suggestions, you’re not overreacting. The good news is that you can disable smart voice assistant features you don’t need, so you control what gets recorded, saved, or shared. You’ll also cut down on spam, and you may notice better battery life in some setups when you turn off extra background options.
In the next sections, you’ll find simple, model-by-model steps to tighten things up for Amazon Alexa, Google Assistant, Apple Siri, and Samsung Bixby, without making your speaker useless. Start with these settings today, then sleep better knowing your home feels more private.
Shut Down Amazon Alexa’s Nosy Habits Step by Step
You can stop a lot of Alexa privacy creep with a few focused switches. Think of it like closing the blinds and then taking the next step: clearing the log of what was seen, too. Follow the steps below in the Alexa app (or via amazon.com/alexa-privacy) so you can disable Alexa microphone access and reduce what gets saved.
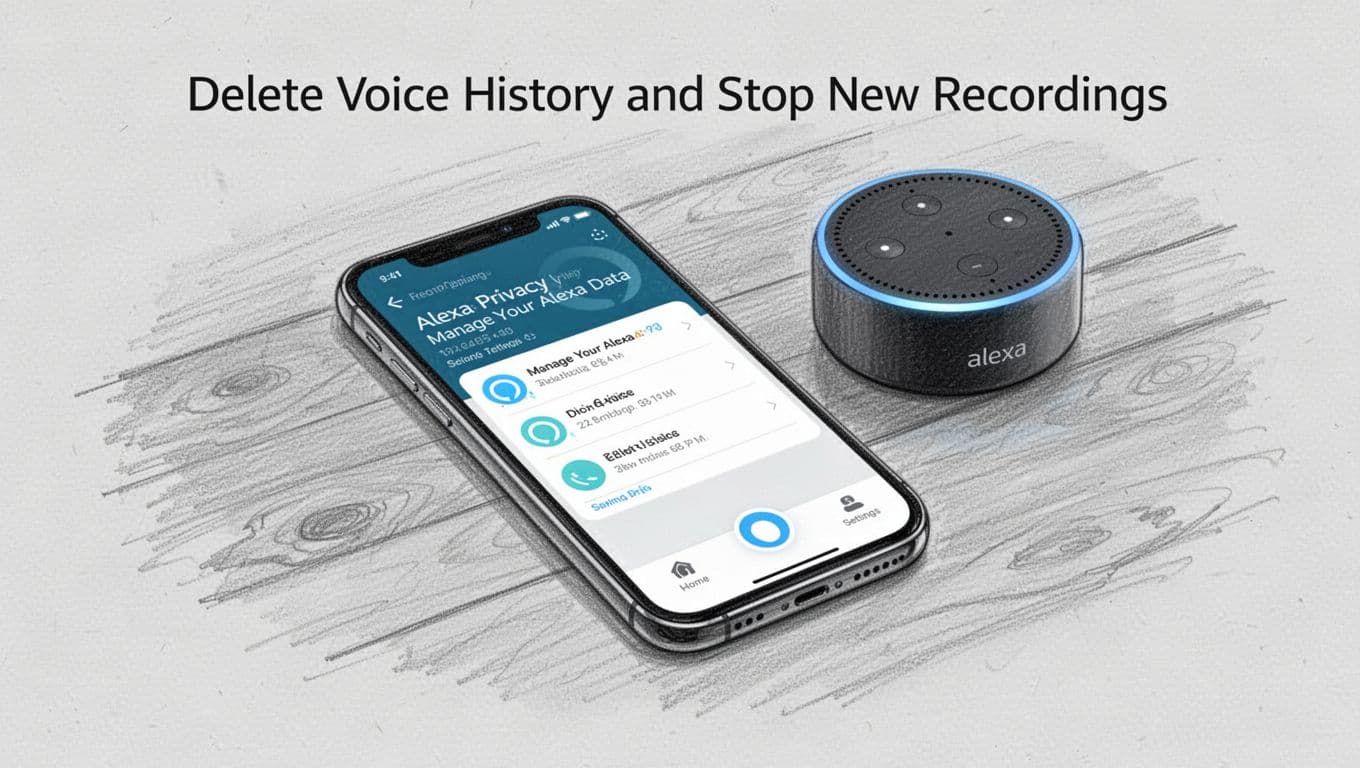
Delete Voice History and Stop New Recordings
Start by removing what Alexa already collected, then cut down what it saves next.
- Open the Alexa app.
- Tap More.
- Go to Settings.
- Choose Alexa Privacy.
- Select Manage Your Alexa Data.
- Toggle off Use voice recordings.
Next, clean up your past recordings:
- Return to Alexa Privacy.
- Tap Review Voice History.
- Choose Delete options (for example, all history).
- Delete all or delete by date.
If you want less work later, set auto-delete:
- In the same privacy area, choose an auto-delete schedule.
- Pick 3 months or less when you see that option.
Why this helps: turning off voice recording storage and deleting history reduces the chance Amazon keeps your chats for later AI training. In simple terms, you’re telling Alexa to stop filing your conversations.
One more reality check: with Alexa Plus rollout changes in 2026, some advanced data retention can still happen. The controls you use still matter, but you might not get a perfect “off switch” for every processed copy. Amazon’s official guidance explains the delete flow here: delete Alexa voice and chat history.
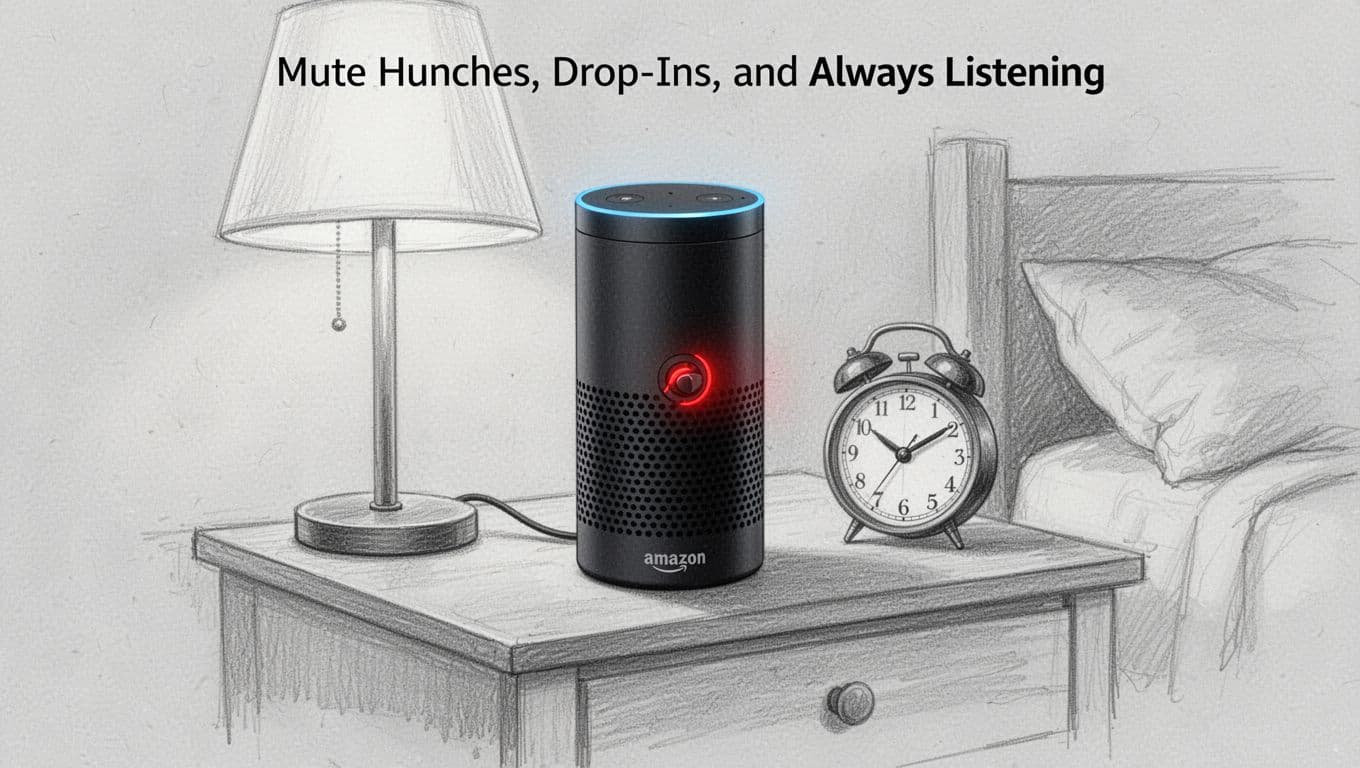
Mute Hunches, Drop-Ins, and Always Listening
Alexa can feel “in your business” in two main ways: it guesses your needs, and it lets other people connect.
First, stop the surprise calls and routine guesses.
- Turn on Do Not Disturb so notifications and alerts do not interrupt you.
- Then set Communications so you do not get sudden Drop In access.
Use this order:
- In the Alexa app, go to Devices.
- Select your Echo device.
- Turn on Do Not Disturb.
- Open Communications.
- Set Drop In to off (or restrict it tightly to your household).
Also, use the physical control. Every Echo has a mic mute button. Hit it when you walk away. It’s the closest thing to “hit this button to stop the spying,” because the wake path is blocked.
Finally, cut “hunches” for each device so Alexa stops trying to predict your next move. In the Alexa app, find Hunches and toggle them off. If you want the official basics, start with turn hunches on or off.
If you do just one habit daily, make it this: mute the mic when privacy matters, then unmute when you actually need voice.
Lock Out Google Assistant’s Constant Eavesdropping
If you want to stop Google Assistant from sounding like it’s hovering in the next room, you need to do two things. First, cut the recording trail. Next, turn off the behaviors that use location or personal data to tailor what you see.
That combo makes your settings feel less like “maybe” and more like a locked door.
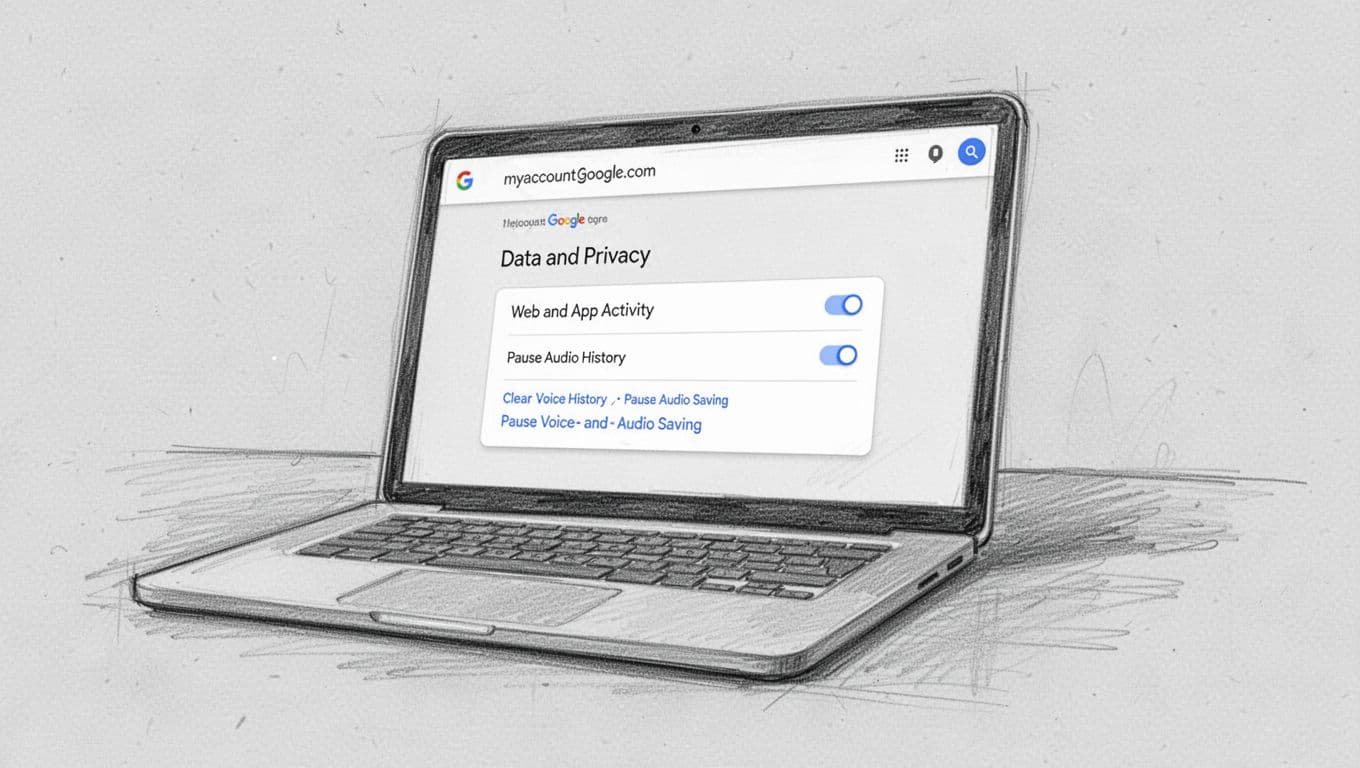
Clear Voice History and Pause Audio Saving
Start in your Google Account so Google stops saving voice and audio activity in the first place. Then delete what’s already stored.
- Go to myaccount.google.com
- Open Data & Privacy
- Find Web & App Activity
- Uncheck Include voice and audio
- Confirm the change
Next, delete what’s already in your history.
- Go to myactivity.google.com
- Open Voice & Audio
- Choose Delete
- Pick All time (or delete by date)
- Repeat until the recordings you care about are gone
Want it to stay quiet automatically? Turn on auto-delete.
- In myaccount.google.com, go to Data & Privacy
- Open Web & App Activity
- Look for Auto-delete
- Set it to 3 months if that option appears for your account
Google also explains the “voice and audio activity” control and deletion process in its help center, including where the toggle lives for different devices. For example, here’s the official guide for managing and deleting assistant activity: Manage audio recordings in Web & App Activity.
Disable Personalized Results and Location Tracking
Now tighten the “why does it know that?” side of Google Assistant. Personal results and location can turn normal answers into tailored predictions.
In your Assistant settings:
- Turn Personal results off
- This prevents Assistant from showing account-specific results on supported devices
Then handle location:
In myaccount.google.com:
- Go to Data & Privacy
- Open Location History
- Turn Location History off (pause it)
Also turn off ad targeting so your voice and searches don’t feel “connected.”
In myaccount.google.com:
- Go to Data & Privacy
- Find Ads settings
- Set Ads personalization to off
If you share devices, check for shared voice features too. Voice sharing helps Google recognize you across a home. You can disable that with Voice Match settings in the Google Home/Nest flow.
For personal results, Google lays out the exact toggle here: Change personal results settings.
Finally, take one physical step for peace of mind. Use your smart speaker’s mic mute when you’re not using it. It’s simple, fast, and it blocks the wake path.

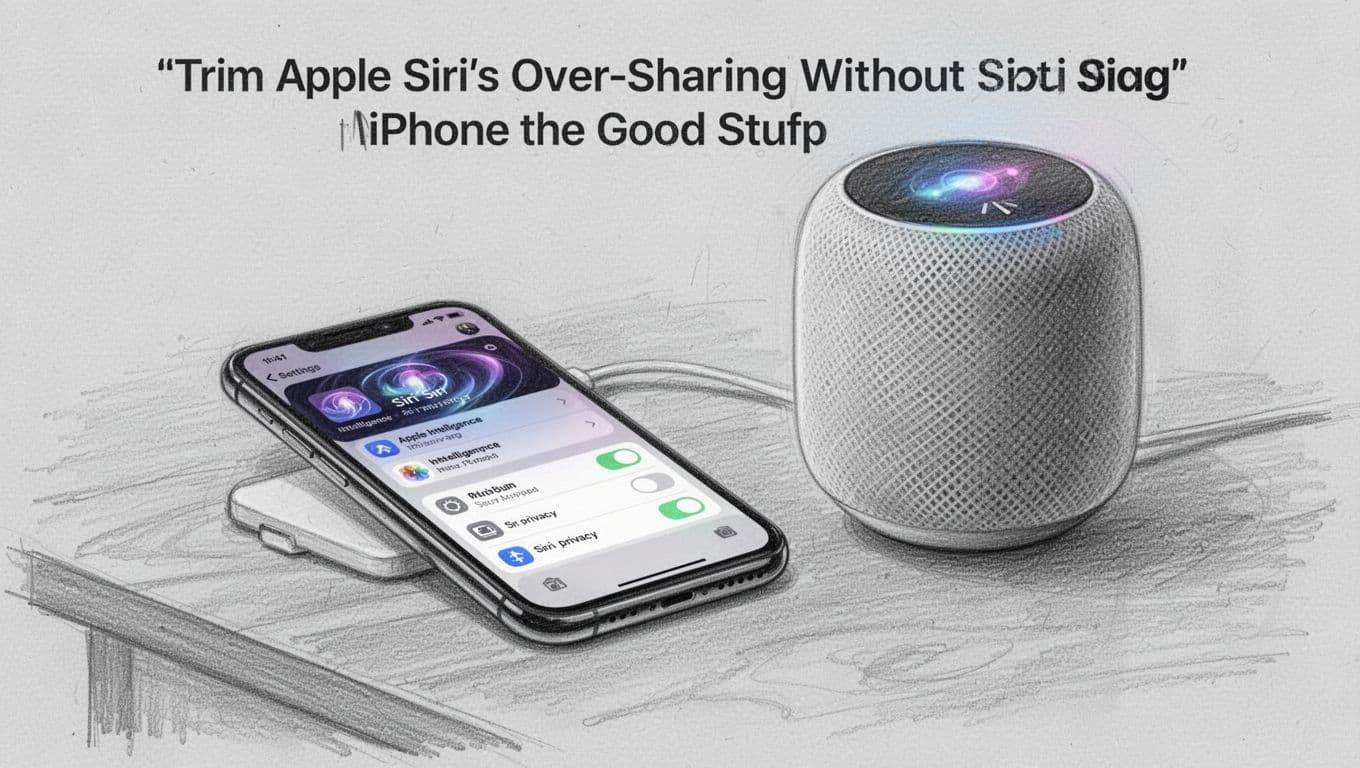
Trim Apple Siri’s Over-Sharing Without Losing the Good Stuff
If Siri feels like it’s “too helpful” with your voice, you can tighten things up fast. The goal isn’t to kill Siri, it’s to stop the parts that store, share, or guess.
Think of Siri settings like a pantry. You still want the spices you use daily. However, you don’t need every jar labeled and placed on the shelf.
Wipe Siri History and Turn Off Analytics
Start with the stuff Apple already has. Then, stop Apple from using new voice data to improve Siri.
- Open Settings.
- Go to Privacy & Security.
- Tap Analytics & Improvements.
- Turn off Improve Siri & Dictation.
That switch matters because it stops Apple from using your future Siri recordings to train or improve Siri. In other words, Siri still works for you, but you reduce what gets shared upward.
Next, delete what’s already stored:
- Open Settings.
- Go to Apple Intelligence & Siri.
- Tap Delete Siri History.
- Confirm.
Apple may also show a “recent recordings” window for deletion. So, after you delete, give it time and then re-check on the same page later.
After that, use the Siri activation controls. If you want fewer moments where Siri listens, change how Siri wakes up:
- Go to Settings > Siri (or Siri & Search).
- Under Hey Siri: Listening & Typing, turn off Listen for “Siri” or Hey Siri.
- Use the button instead for activation.
This is the cleanest way to disable Siri always on behavior while keeping voice control available.
If you want an official walkthrough for Siri basics first, Apple covers setup and activation here: Change Siri settings on iPhone.
Finally, turn off the “smart guess” layer that can feel like Siri is reading your mind. Go to Settings > Siri & Search, then switch off suggestions (like search and lock screen suggestions). Also, scroll your app list and turn off per-app learning.
Deleting history helps, but turning off analytics stops the next batch. Do both for the best privacy win.
Stop Suggestions, App Learning, and Location Use
Now focus on the settings that make Siri helpful in ways you might not want.
Turn off Siri suggestions and app learning
- Open Settings.
- Go to Siri & Search.
- Under Suggestions, turn off options like Suggestions in Search and lock screen suggestions.
- Then scroll through the app list.
- Turn off Learn from this App and any “show in search” style options.
Apple gives Siri more context when you allow per-app learning. Disabling it reduces the odds that Siri builds a pattern from your usage.
Block Siri from using your location
- Open Settings.
- Go to Privacy & Security.
- Tap Location Services.
- Find System Services.
- Select Siri.
- Set it to Never.
Because location can make voice results feel more “aware,” this one change helps most people feel calmer. If you still want maps and hands-free calls, you can keep those in the apps you choose. Siri does not need system-level location access.
Disable Siri in third-party apps
Siri also interacts with other apps through search and shortcuts. To cut that back:
- Go to Settings > Siri & Search.
- Scroll to Third-Party Apps.
- For each app, turn off Show Content in Search, Suggest App, and Learn from this App where available.
Reduce Ads Targeting and Tune HomePod Voice Recognition
Ads can sneak in through Apple’s ad personalization. So, adjust that before it becomes a habit.
- Open Settings.
- Go to Privacy & Security.
- Tap Apple Advertising.
- Turn off Personalized Ads.
On HomePod, you can also stop it from recognizing specific voices.
- Open the Home app.
- Tap your HomePod.
- Tap the Settings gear.
- Find Voice Recognition (or Recognize My Voice).
- Turn it off.
This helps you avoid situations where HomePod treats your household voice as a key. You can still use voice control, but it relies less on identifying who spoke.
Also remember the simple physical option. Use the mic mute:
- On iPhone, use Control Center to mute Siri audio.
- On HomePod, press the mic mute area (or use the Home controls).
That physical barrier is like closing a door. Even when you forget about settings, the mic stays blocked.
And no, you do not need to chase big 2026 changes to get results. These toggles stay the core privacy levers on iOS and HomePod, so your control comes from what you switch off, not from waiting for future updates.
Quickly Sideline Samsung Bixby’s Intrusive Features
If Bixby feels like it talks back even when you didn’t ask, you’re not alone. The fastest privacy win is to disable Bixby microphone access and shut off the behaviors that trigger it.
Start with the phone-level controls first. Then, clean up voice files. After that, handle the settings that can pull in ads and location.
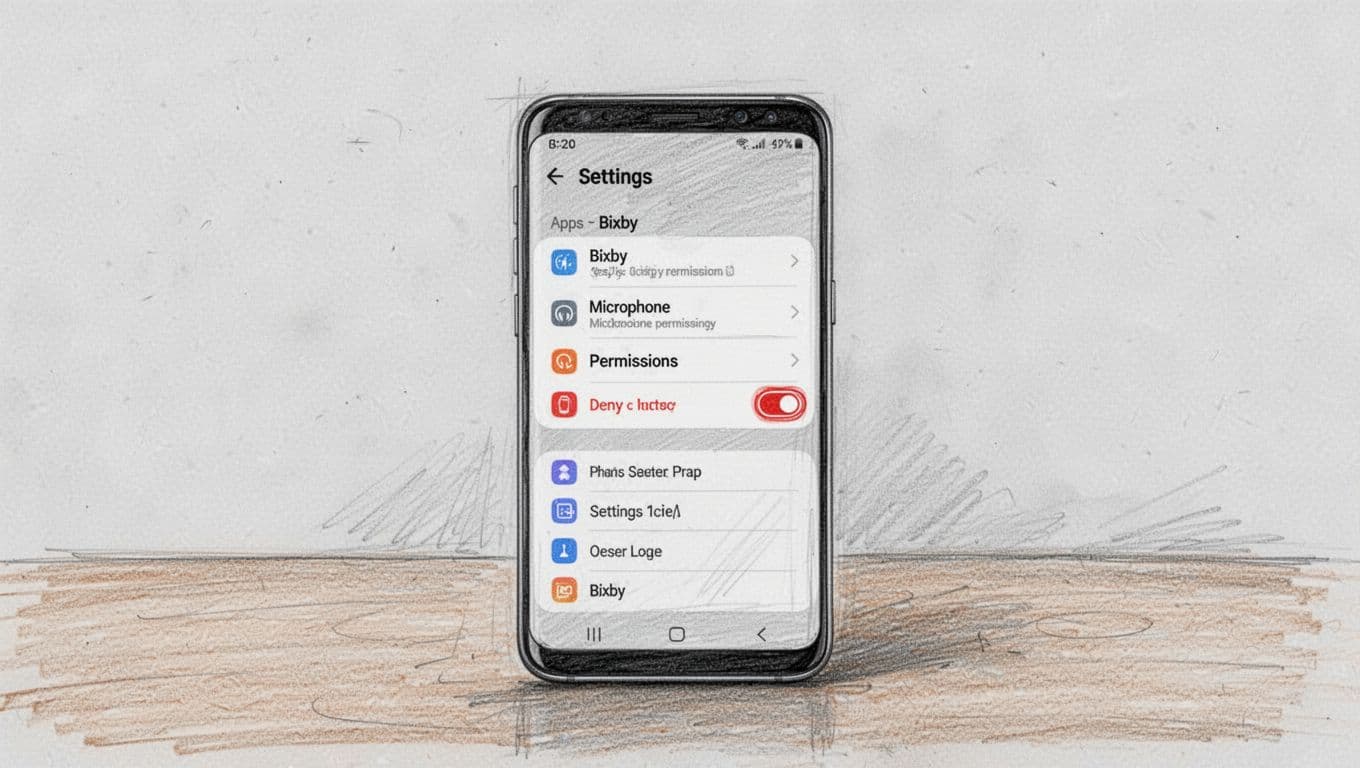 Bixby > Permissions screen with microphone permission set to deny, at a slight angle. Light shading and thin linework on very light gray paper background.” />
Deny Bixby mic and location at the permission level
This is the core move. When you deny permissions, Bixby can’t use the mic or location even if other features are still enabled.
Do this on your Galaxy phone:
- Open Settings.
- Tap Apps.
- Tap Bixby.
- Go to Permissions.
- Tap Microphone, then set it to Deny.
- Tap Location, then set it to Deny (or revoke the same way).
If you see more than one Bixby-related item, deny mic permission for each one. Some models split “Bixby Voice” from other Bixby apps, so check both.
For deeper help with Bixby controls, Samsung’s guide on the feature setup is here: turn off Bixby on your Galaxy phone.
Revoke Bixby mic using Permission manager
Next, confirm the change using the privacy dashboard. This catches cases where Bixby gets mic access from a separate permission switch.
- Open Settings.
- Tap Privacy.
- Tap Permission manager.
- Find Microphone.
- Look for Bixby (or Bixby Voice).
- Set it to Deny or Don’t allow.
After you do this, reboot your phone if anything still feels “listening.” Then test normally by waiting a day, not just right after the change. Apps sometimes re-prompt after updates.
Turn off Bixby key and Bixby routines
Now remove the shortcuts that make Bixby show up when you press a button or follow a routine.
- Open Settings.
- Tap Advanced features.
- Tap Bixby key (or the matching option).
- Set it to Off.
Then check routines:
- Still in Advanced features (if available).
- Tap Bixby key or Routines.
- Turn the triggers Off.
Think of this like unplugging a thermostat. Even if the sensor still exists, it shouldn’t start heating your “privacy settings” routine by accident.
Delete Bixby voice files
Permissions stop new access, but old voice data can still sit on your device. So delete it.
- Open the Bixby app.
- Tap Voice files.
- Delete saved voice files you don’t want kept.
If you use Bixby for calls or commands, keep only what you need. Then delete the rest so your device holds less history.
Samsung community posts can also help if your menu names look different by model, like Samsung Bixby permissions.
Cut extra privacy signals (ads and location) in Google settings
Even if you silence Bixby, ads and location choices can still connect the dots.
In Google settings:
- Turn off location history and location-based personalization.
- Review ad personalization settings and switch it off if you see it.
On many phones, these live under your Google Account. If you skip this step, you might still get tailored results based on your broader activity.
Disable third-party app permissions that can spy through Bixby
Bixby can interact with other apps. So you also want to restrict mic access for third-party apps.
Go to:
- Settings > Apps > [app name] > Permissions
- Then set Microphone to Deny for apps you don’t trust.
This reduces the chance another app pipes audio to a feature you disabled.
Use the physical mic habit (when you can)
Finally, use a habit that requires zero menu surfing. When you finish voice tasks, use the device mute controls for mic-enabled features. It’s the most reliable layer when you’re busy and you don’t want to think.
Also, check for updates from Samsung occasionally. Sometimes a new One UI version changes where privacy toggles live, so confirm the Bixby mic permission after updates. For model-specific paths, Samsung support pages are usually the safest reference.
Extra Shields: Privacy Wins for Every Voice Assistant
Even after you tweak Alexa, Google, Siri, and Bixby, a few extra steps pay off across all of them. Think of your privacy like layers of clothing. Each one alone helps, but together they work better.
Also, remember this: voice assistants often keep working as long as they can hear a wake word. So the goal becomes smarter control, not “perfect silence.” With the right habits and settings, you can still reduce recordings, limit personal tailoring, and make accidental captures less likely.
Use the physical mic mute, every single day
This is the simplest voice assistant privacy tips 2026 move, and it beats any menu setting. When the mic is physically muted, the wake path gets blocked. That means fewer accidental activations when you’re talking to someone else.
Make it a daily routine:
- Mute during private moments (calls, bedtime, kids’ conversations).
- Mute overnight if you live alone or don’t need alarms.
- Unmute only when you need a command (music, timers, quick questions).
If you have multiple devices, do the same across each one. A muted speaker still looks “on,” which is exactly why this habit matters.
Physical mute is your best friend because it stops listening at the source.
Turn on 2FA for every account tied to voice
Voice assistants connect to your Amazon, Google, Apple, and Samsung accounts. If someone gets into one account, they can do more than read settings. They can also change what the assistant can access.
Enable two-factor authentication (2FA) on:
- Your main email (the front door)
- Your voice assistant account
- Any linked music or shopping accounts
If you share devices with family, enable 2FA for each person’s accounts too. Shared homes make this step even more important.
Lock down connected apps and services monthly
Voice assistants can pull in skills, actions, and third-party apps. Over time, those connections stack up like loose cords behind a desk. Some apps ask for mic or “voice” permissions without needing them.
Once a month, check:
- What skills are enabled (and which you forgot)
- What apps have microphone or calendar access
- Any automations that run hands-free
Disable anything you don’t use. Also, remove old integrations you don’t recognize.
For a practical government-style checklist, use FTC advice on securing voice assistants. It keeps the focus on actions you can take right now.
Secure your Wi-Fi to reduce “open door” risk
Your voice assistant lives on your home network. If Wi-Fi is weak, other devices can become a back door.
Do these fixes:
- Use WPA2 or WPA3 encryption.
- Change the default router password.
- Turn off remote admin (unless you truly need it).
- Use a separate guest network for visitors.
Guest Mode matters because it reduces the chance someone logs in or links accounts from your Wi-Fi. For privacy, that separation is quiet insurance.
Guest Mode and account hygiene for shared homes
In shared households, privacy drops when guests can sign in on the same network or devices. Use Guest Mode everywhere you can, and avoid signing into personal accounts on shared speakers.
Also review account linking:
- Remove old phone numbers
- Re-check saved addresses and payment options
- Limit which profiles each assistant can recognize
When in doubt, keep it simple. Fewer connected identities means fewer “oops” moments.
Review privacy policies yearly as AI behavior changes
In 2026, assistant behavior keeps shifting with new models and new rules. Even if settings look the same, data handling can change behind the scenes.
Once a year, skim for changes related to:
- Voice recording retention
- Training and improvement use
- Third-party sharing
- Opt-out options
You don’t need to read every word. Instead, search the policy for key lines about recordings, training, and data sharing. Then update your opt-outs.
Battery and privacy bonuses you can feel
Turning off extra listening features can also help in real life. Some devices use fewer background processes when you reduce integrations and keep voice features limited.
You may notice:
- Less device “chattiness” from notifications
- Fewer false wake-ups
- Better battery on phones used for voice control
None of these replace privacy settings, but they help you stick with the changes.
Quick recap: what makes the biggest difference
If you only do a few things, do these in order. They cut risk while keeping voice useful.
- Physically mute microphones when you don’t need them.
- Turn on 2FA for assistant-linked accounts.
- Check connected apps monthly and remove what you don’t use.
- Use secure Wi-Fi and Guest Mode in shared spaces.
You can’t always fully disable always-listen behavior. Still, these extra shields reduce what gets captured, saved, and misused.
Conclusion
You don’t have to live with “always on” privacy risk. When you disable unnecessary features, the big wins stack up fast, fewer recordings, fewer ad pushes, and fewer chances your mic stays open when you don’t want it to. Across Alexa, Google Assistant, Siri, and Bixby, the most effective control comes from switching off what stores voice and what builds personal targeting.
Pick one device and start now. Follow the steps you already read, delete the voice history, mute the mic when you’re done, and turn off voice and ad personalization settings you don’t need. Then come back once a month and scan for changes, since assistant behavior can shift after updates and AI features get refined.
AI updates move quickly, so your job stays simple, keep the basics tight and re-check the settings that matter most. You have more control than the default setup ever suggests, and with the right tweaks, your voice assistant can serve you without acting like it’s spying.
What’s the first toggle you’re going to change today, and which one surprised you the most? Share your settings in the comments, and subscribe for more practical privacy guides.