Ever hit a site and thought, “Why is this taking so long?” You wait for videos to start, pages to finish loading, and annoying pop-ups to go away. Then you switch browsers, reboot your router, and nothing changes.
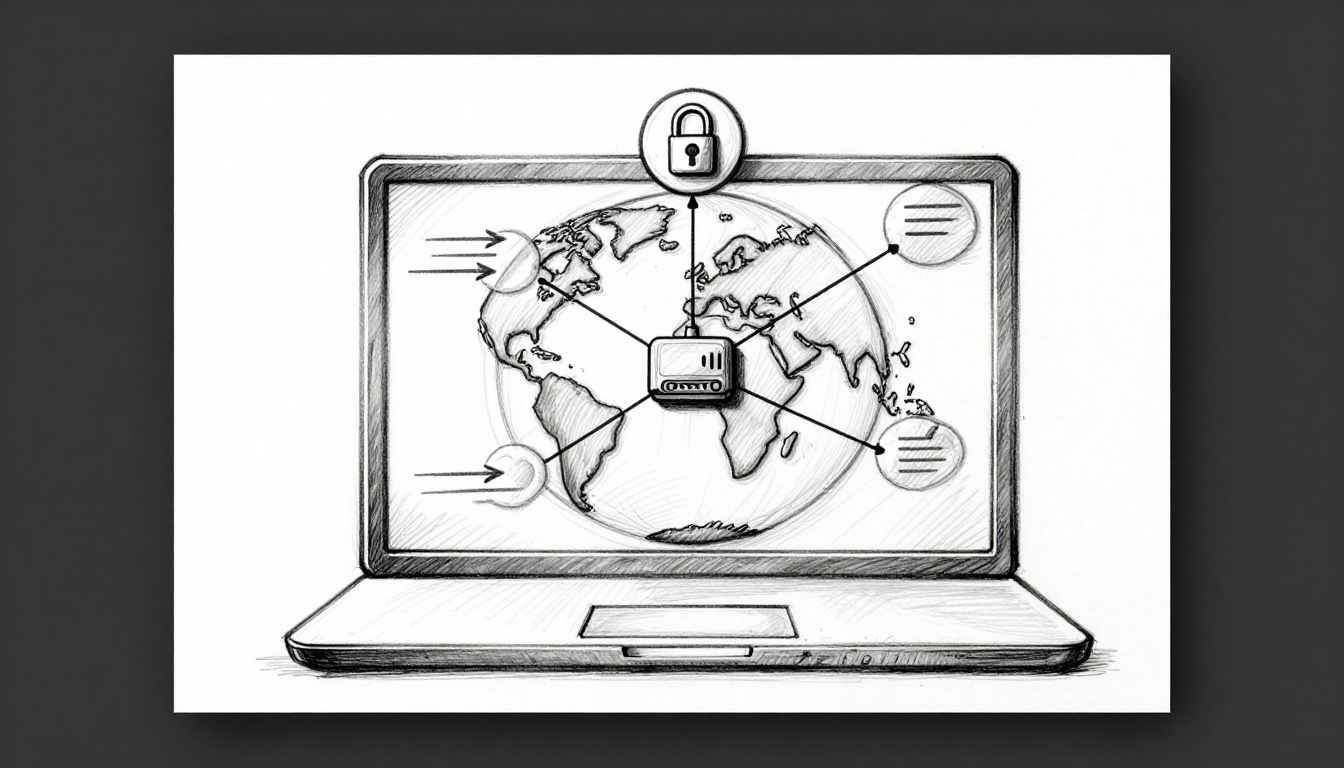
That’s when DNS often shows up as the hidden culprit. DNS is like a phone book for the internet. It turns the website name you type (like example.com) into the address your device needs to connect.
Most people stick with their ISP’s DNS. It can be slower than it needs to be, and it may not block common threats. The good news: switching DNS can help you get faster lookups and stronger protection, often without extra software.
This beginner guide shows how DNS works, what to watch for, and exactly how to change it on Windows, macOS, phones, and routers. It’s updated for March 2026, with clear picks for speed and security, plus quick ways to test your results.
What DNS Really Does and Why Your ISP’s Version Falls Short
DNS stands for Domain Name System. When you type a site name into your browser, DNS finds the matching IP address. Without that, your browser would have to guess the address, which would make browsing painful.
So what does your ISP do? Usually, your ISP runs a DNS resolver for you. That resolver answers DNS lookups, but it can be slow, crowded, or lightly secured. In contrast, public DNS providers run large networks and handle queries from many locations.
Here’s why that matters. DNS lookups happen before many pages load. If those lookups take longer, everything starts late. In 2026 speed benchmarks, public DNS often keeps latency under about 50 ms, while many ISP setups land closer to 50 to 100+ ms. Over time, that adds up, especially on slower Wi-Fi or during peak hours.
Security is the other big piece. Your DNS provider can also filter risky domains and reduce exposure to phishing or malware hosts. Many ISP DNS setups provide little threat blocking, and some log more than you’d expect. That doesn’t mean every risk disappears after you switch DNS, but it can cut a common path attackers use.
If you want a solid, beginner-friendly explanation of how DNS works, start with Cloudflare’s guide to what DNS is. It’s easy to read and helps you connect the “phone book” idea to the real lookup steps.
How DNS Works Without the Tech Overload
Think of DNS like mailing a letter. You write the name on the envelope (the domain). DNS helps find the correct mailbox number (the IP address). Your device then uses that number to connect.
Modern DNS lookups involve a few simple ideas:
- Your device asks a DNS resolver for an IP address.
- The resolver finds the answer by checking the DNS records.
- Your device uses the IP to reach the server and load the site.
Even better, DNS caching helps. Once a resolver learns an address, it can reuse that info for a while. That’s one reason public providers can feel faster, even when your internet plan doesn’t change.
Now for security upgrades. Traditional DNS traffic can be easier to snoop on. That’s why many services support encrypted DNS options like:
- DNSSEC (adds checks so answers are less likely to be forged)
- DoH (DNS over HTTPS), DoT (DNS over TLS) (encrypts the DNS query)
- DoQ (DNS over QUIC) (a newer fast option some providers support)
You don’t need to understand every acronym to benefit. The important part is this: better DNS can answer faster and reduce the chance that lookups get tampered with.
Red Flags of Sticking with ISP DNS
Your ISP DNS might be fine most days. But if any of these sound familiar, it’s worth switching.
- Laggy browsing: pages feel sluggish, especially when you open new tabs.
- Weak threat filtering: you still land on phishing pages that a safer resolver might block.
- More logging than you realize: some DNS logs can reveal browsing habits to the provider.
- Inconsistent performance: response time changes by neighborhood and network load.
- No encrypted DNS: without DoH or DoT, lookups can be easier to observe on some networks.
The timing also matters. Between 2025 and 2026, phishing and drive-by scams kept showing up across email, ads, and fake login pages. Better DNS filtering can stop some of those attempts before your browser even connects.
Switching DNS won’t replace HTTPS or safe browsing habits. Still, it can remove a common early step attackers use.
Unlock Faster Speeds, Ironclad Security, and True Privacy with These Perks
Switching DNS is one of the few internet tweaks that can improve both speed and safety. It’s also simple. You’re changing one “who answers your phone book” step.
On the speed side, lookups often happen quickly on public DNS networks. In 2026 benchmarks, public DNS can reduce average DNS latency by about 20% to 50% versus many ISP resolvers. That doesn’t guarantee every page will load instantly, but it frequently means fewer delays at the start.
Security benefits show up in two ways.
First, many public DNS providers add DNSSEC validation and reduce certain spoofing risks. Second, some providers run blocklists for known malicious domains. That can reduce visits to phishing, malware distribution, and botnet command pages.
Privacy is the third reason people switch. With encrypted DNS (like DoH or DoT), DNS queries can be harder for on-path snoops to read. Also, some providers promise to limit logs.
Still, be clear about one thing. DNS settings don’t hide your IP address from websites. That’s what VPNs and similar tools help with. What DNS can do is reduce what your DNS provider knows, and reduce what local network observers can see.
Here’s what you can realistically expect in everyday life:
- Smoother streaming start-ups, especially when you hop between services.
- Safer browsing, because risky domains get blocked earlier.
- Fewer “weird” pages, caused by bad sites that rely on DNS routing tricks.
You may also find that you don’t need a VPN just to get basic safety. Many people use DNS switching as a first line, then add a VPN if they want IP hiding too.
Meet the Top Public DNS Picks for Beginners in 2026
Ready to choose? Start with a simple goal: pick a DNS provider that’s fast, supports security checks, and keeps reasonable privacy expectations.
For March 2026, recent public rankings based on speed, security, and privacy consistently put these services near the top. Cloudflare tends to lead on speed and privacy, while Quad9 leans harder into threat blocking.
If you want to compare results from your own location, use DNSPerf and run a few tests. DNS speed can vary by region, so personal testing matters.
Quick comparison: which DNS is best for what?
Here’s a beginner-friendly shortlist. The IPs below are the ones you’ll enter into DNS settings.
| Provider | Primary / Secondary DNS | Best for | Security & Privacy Highlights |
|---|---|---|---|
| Cloudflare | 1.1.1.1 / 1.0.0.1 | Speed + privacy | Fast, supports DNSSEC, encrypted DNS options |
| Google Public DNS | 8.8.8.8 / 8.8.4.4 | Everyday reliability | Strong DNSSEC support; privacy varies by policy |
| Quad9 | 9.9.9.9 / 149.112.112.112 | Maximum security | Built-in threat blocking focus |
| AdGuard DNS | 94.140.14.14 / 94.140.15.15 | Ad/tracker blocking | Helps cut junk and unwanted domains |
| NextDNS | Custom (profile-based) | Custom control | Great filtering control without heavy setup |
| CleanBrowsing | 185.228.168.9 / 185.228.169.9 | Families and safer filtering | Family-safe content filtering options |
Because you’re new, keep it simple. Pick one and test it for a day.
If you want a broader benchmark-style comparison before you decide, see Public DNS resolver comparison and privacy notes.
Cloudflare DNS: Your Go-To for Blazing Speed and Zero Snooping
Cloudflare is the easiest first pick for most beginners. In 2026 tests, it often ranks near the top for DNS speed. It also supports modern encryption options such as DoH and DoT.
Common IPs:
1.1.1.11.0.0.1
Cloudflare also emphasizes short log retention (often described as 24 hours) and a privacy-first approach. That’s a big reason people call it a “swap and forget” option.
Pros:
- Very fast lookups in many regions
- Supports DNSSEC and encrypted DNS options
- Straightforward to set up
Cons:
- Some advanced parental control features may be less “turnkey” than family-first services
- If you want maximum threat blocking above all, Quad9 may fit better
Quad9 and AdGuard: Security Champs That Block Junk Automatically
Quad9 is built for people who want DNS-level protection. It focuses on blocking known risky domains, including phishing and malware hosting patterns. That can reduce the chance you connect to dangerous sites.
Quad9 IPs:
9.9.9.9149.112.112.112
AdGuard is a great choice if ads and trackers bother you. It adds DNS-based filtering that can stop some ad and tracking domains from loading.
AdGuard IPs:
94.140.14.1494.140.15.15
If you hate cookie consent pop-ups and constant tracking, AdGuard can feel like a clean sweep. If you’re mostly worried about scam sites, Quad9 is the safer bet.
Pros:
- Less junk before your browser even loads content
- Good fit for “set it once” security
Cons:
- Some sites might break if they rely on blocked domains
- Filtering strength can differ based on your chosen mode (especially with custom providers)
Custom Gems Like NextDNS for Power Users Starting Out
NextDNS can be more “powerful” than it sounds. It lets you set filtering rules and preferences without changing every device individually.
You typically set it up using an account and then enter specific DNS settings on your devices. Many features work with profiles, so you can create different rules for different users or devices.
Why beginners like it anyway: you can start with the free tier and adjust slowly. Then, when you want more control, it’s already there.
If you want a quick overview of top providers and how they compare, you can also check a 2026 list of best DNS servers. It can help you cross-check choices beyond the common names.
Change Your DNS in Minutes: Guides for Windows, Mac, Phones, and Routers
Before you change anything, write down your current DNS settings. That way, you can roll back quickly if you see issues.
Also, keep in mind one rule. If you change DNS on your router, every device on your home network uses it. That’s often the simplest path for smart TVs, game consoles, and devices that lack easy settings menus.
Quick Swap on Windows or Mac Computers
Here’s the common approach for both Windows and macOS: update DNS settings for your active network.
For most Windows 10 and 11 setups:
- Open Settings.
- Go to Network & Internet.
- Click your Wi-Fi or Ethernet connection.
- Under DNS server assignment, select Edit.
- Switch to Manual.
- Enter your Primary and Secondary DNS IPs.
- Save, then restart your browser.
On macOS, the path is similar but the menus differ:
- Open System Settings.
- Go to Network.
- Select Wi-Fi or Ethernet.
- Click Details (or the DNS area).
- Choose DNS and set the servers.
- Save changes.
- Restart the browser.
If you want a device-by-device walkthrough with screenshots-style guidance, this guide is beginner-friendly: how to change your DNS server on Windows, Mac, smartphones, and routers.
Mobile Magic: Android and iPhone DNS Tweaks
On phones, you’ll usually set “Private DNS” rather than editing IP addresses directly.
Android
- Open Settings.
- Tap Network & Internet.
- Tap Private DNS.
- Choose Private DNS provider hostname if available.
- Enter the provider setting if the app uses one, or set the DNS servers if your Android version supports it.
- Save, then test a website.
iPhone (iOS)
- Open Settings.
- Tap Wi-Fi.
- Tap the info icon next to your network.
- Look for Configure DNS.
- Add your DNS servers.
- Save, then check a site.
On some iOS versions, you may need a config profile for Private DNS options. If you prefer fewer steps, DNS apps can simplify setup. Still, always verify you trust the app’s permissions.
Router-Level Change for Whole-Home Wins
This method is popular because it fixes browsing issues across everything.
- Connect to your home network.
- Open a browser and go to your router gateway, often
192.168.1.1. - Log in.
- Find WAN or Internet settings.
- Look for DNS and set Primary and Secondary.
- Save changes.
- Reboot the router.
- Test from a different device (like a phone on Wi-Fi).
Router changes can take a few minutes to propagate. After that, your smart TV apps and game consoles should start using the new DNS automatically.
Test Your New Setup and Squash Any Glitches Fast
Once you switch DNS, test it. Otherwise, you’re guessing.
For speed testing, run benchmarks in DNSPerf. It uses many locations, so you get a clearer picture of what’s changing.
For privacy testing, check for leaks using a DNS leak test tool. Here’s a beginner guide to perform a DNS leak test: how to perform a DNS leak test.
If something feels off, here are common fixes:
- Flush your DNS cache on your computer.
- Windows:
ipconfig /flushdns - macOS: restart the browser or device (some versions vary)
- Windows:
- Confirm you entered the right IPs (one wrong digit breaks everything).
- Restart the browser and try again.
- If you changed DNS on a router, reboot that router.
Finally, remember this: the change is reversible. If a site fails to load, switch back to your previous DNS servers and test again. You can also try a different public resolver, like Cloudflare first, then Quad9 or AdGuard.
Conclusion
That “buffering and slow loading” feeling can start with DNS delays. Switching to a faster public resolver can reduce lookup time and make browsing feel smoother.
For most beginners, Cloudflare is the easiest start. If you want stronger threat blocking, Quad9 is a smart second choice. Whatever you pick, follow the steps, then test with DNSPerf so you know it worked.
If you run into weird glitches, flush DNS, double-check the IPs, and remember you can always revert. Want to take the next privacy step too? Pair smarter DNS with a VPN when you need IP hiding, then compare results across your favorite sites.
What DNS provider are you going to try first today?